 |
| Project pain > where all the files that you may use go, like a library. |
| Time Line > Where you arrange your art work/assets. |
 |
| Composition window > where you can watch back or/and to arrange assets (specially) |
 |
| Every project must have at least one composition (similar to when creating a page in InDesign) |
 |
| Pre set PAL (UK Standard) this will set a lot of the other options, dimensions; 1050px by 576px. Frames set at PAL are 25 frames per second. |
 |
| Now there should be assets in the Project pain and more information on the time line. |
 |
| last week we only experimented with solid layers , explored key frames then animated them. |
 |
| Lowering the resolution will allow for quicker play back. |
 |
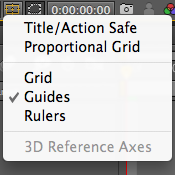
| Title and action safe guides are also available in After Effects. |
 |
| Opening files in After Effects |
 |
| When importing the default for the import will be footage, this means it will occupy one layer. After Effects will ask again how you want to import (below) |
 |
| The file will be imported into your project pain, any images or file you import are linked much like Indesign. Once imported drag and drop into composition pain. |
 |
| You may want or need to adjust the colour of the background you have the same options with the imported file as with the solid layer. |
 |
| it is also possible to have a multiple layered Photoshop document and import it into AE |
 |
| instead of importing as footage import as composition, you get all the layers when importing as a composition. |
 |
 |
| Double clicking the composition it will open in the time line with all the layers, then you can edit accordingly. |


No comments:
Post a Comment